Blueberry Cornflake Muffins

Blueberries are by far my favorite berry! I think my mom engraved her love of blueberries in me since my some of favorite books growing up was Jamberry and Blueberries for Sal. Blueberries never lasted long in my household. They became muffins, sprinkled over yogurt or cereal, or were used in pancakes to make faces. That’s the one berry we could never spare a single one to make jam or any kind! Thanks to my moms blueberry bushes we always seem to have blueberries in our fridge at all times!

After watching the Netflix Chef’s Table feature on Milkbar, I was inspired by Christina Rossi taking her love of cereal and combining it in with a classic baked good. These blueberry muffins do just that, take my love of blueberry muffins and combine that with the crunchy goodness of cornflakes.

Hope you love this twist on a classic!

Muffins (yields 12 muffins)
½ cup [1 stick] unsalted butter
½ cup sugar
2 cups all-purpose flour
2 teaspoons baking powder
½ teaspoon salt
¾ cup cereal milk (recipe below)
½ teaspoon vanilla extract
2 large eggs
2 cups blueberries

Topping
1/4 cup [1 stick] unsalted butter, softened
1 cup cornflakes, preferably organic or without high fructose corn syrup
1/4 cup turbinado sugar

Cereal Milk (yields ¾ cup)
1 cup milk
¾ cup cornflakes

Instructions
To make the cereal milk – Preheat oven to 300 degrees. Once preheated, toast ¾ cups cornflakes for 15 minutes, until golden. Add the toasted cornflakes to the milk and allow to seep for 20 minutes. Strain mixture through a fine strainer, collecting the milk in a measuring cup. Squeeze the cornflakes to make sure all the milk comes out of the cornflakes. Set aside until needed for muffins. (Make ahead tip – make the night before and store in the fridge until needed for muffin batter)

To make the topping – Cut the butter into cubes. Combine the 1 cup cornflakes, cubed butter and turbinado sugar in a small bowl. Mix with your hands, slightly crushing the cornflakes, until all are combined and there are no more chunks of butter visible. Set aside.

To make the muffins – Preheat the oven to 350 degrees. Grease a 12 cup muffins tin with butter or nonstick cooking stray, or use baking cups. In a medium bowl, whisk the flour, baking powder and salt, set aside. In a large bowl, cream the butter and sugar with a electric mixer until smooth. Add the cereal milk and vanilla, mixing until smooth on low speed. One at a time add the eggs and stop to scrape down the bowls with a rubber spatula if necessary. Add the flour mixture and beat on low speed until just combined. With a spatula, gently fold the blueberries into the batter. Fill the greased muffins tin 2/3 full of the batter. Top with 2 tablespoons of the prepared topping. Bake until a toothpick inserted into the center comes out clean, about 25-28 minutes. Remove the muffins from the oven to cool and enjoy!

Bunny’s Sticky Buns

A visit with my Grandma Bunny was synonymous with baked treats. I don’t ever remember a visit where she didn’t have something either in the oven or fresh from the oven when we arrived. Even if she wasn’t hosting and she was the visitor, you could always count on her to bring something or she would bake something close after her arrival. Her sticky buns were one of my favorites, the maple goodness coupled with the fluffy bun were devoured so quickly that I forgot I didn’t care for nuts, which they have!

This baked good is one that everyone in my family seems to remember and yet no one knew exactly how to make after she passed. Developing this recipe was like piecing together a puzzle, our memory of my grandmother lives on in baked items like this. The dough recipe is from one of my favorite cinnamon bun recipes by Abby Dodge from The Weekend Baker. The filling and sticky bun portion was developed through various trials to recreate a favorite. Through Abby Dodge’s cinnamon bun recipe, I discovered the ease of making cinnamon buns the night before and can easily be baked the next morning! If you aren’t sure you can commit to having a pan of these sitting around in your kitchen, they can easily be frozen and enjoyed at a later date just like my Grandma Bunny would always do. 

DOUGH
1 cup whole milk
8 tablespoons unsalted butter, cut into 6 pieces
3½ cups all-purpose flour
2¼ teaspoons (1 packet) instant yeast
1/3 cup granulated sugar
1 teaspoon table salt
1 large egg

FILLING
8 tablespoons unsalted butter
½
 cup packed dark brown sugar

TOPPING
2 cups chopped pecans (whole pecan also work is preferred)
½ cup unsalted butter
½ cup packed dark brown sugar
½
 cup pure maple syrup
2/3 cup whole milk
¼ teaspoon salt

  1. In a small saucepan over medium heat, combine the milk and the 8 tablespoons butter. Keep stirring constantly, until the butter melts and the liquid registers about 125 degrees on an instant-read thermometer; remove from the heat and set aside.
  2. In a large bowl of a stand mixer, combine the flour, yeast, sugar, and salt and mix until blended.
  3. Check the temperature of the milk mixture, it should now register about 120 degrees on an instant-read thermometer (make sure it’s no lower then 115 degrees for the yeast to grow). 
  4. Fit the mixer with the dough hook and with the mixer on medium-low speed, slowly pour the warm milk mixture into the flour mixture. With the mixer still running, add the egg and mix until the flour and egg are completely incorporated. Increase the speed to medium-high and beat until the dough is smooth and begins to pulls away from the bottom of the bowl, about 5 minutes. If the dough begins to climb the hook, stop the mixer and scrape the dough back into the bowl.
  5. Scoop up the dough and shape it into a ball. Lightly grease the bowl and put the dough back into it. Cover the top securely with plastic wrap (press and seal is very handy at a time like this!). Let the covered dough rise in a warm spot until nearly doubled in size, 45 to 55 minutes.
  6. While the dough is rising, make the topping. Lightly grease a 9-by-13-inch baking dish. Spread the pecans in an even layer in the pan and set aside. In a small saucepan over low heat, combine the balance of the topping ingredients (butter, dark brown sugar, maple syrup, milk and salt) and stir until the butter is melted. Bring to a boil and allow the mixture to boil for 3 minutes. Remove from the heat and pour on top of the pecans. Set aside and return to the dough once it is risen.
  7. Turn the dough out onto a clean surface and roll out the dough into a 12-by-17-inch rectangle; stretching the dough as necessary to get it into a rectangle. Melt the 8 tablespoons of butter and pour the melted butter into the center of the rectangle and spread evenly over the dough with a spatula. Sprinkle the 1/2 cup brown sugar evenly over the butter.
  8. Starting on a short side, roll up like a jelly roll. If necessary, pinch the long seam of the dough to the roll to seal. Position the roll, seam side down, on the work surface and cut into 12 slices (1 inch wide). Arrange the slices, cut side up, in the prepared pan on top of the pecan and syrup, forming 4 rows of 3 slices each.
  9. Preheat the oven to 350°. Bake rolls for 35-40 minutes until they are golden brown. Remove pan from the oven and allow to cool for 5 minutes.
  10. Using oven mitts, carefully invert the pan onto a large platter (expect the topping to melt down the sides once inverted). Serve warm or freeze portions for later use.

Note – to make overnight, prepare through step 8. Cover the rolls tightly and refrigerate for 8-12 hours. The next morning, remove from the refrigerator and allow to rise on the counter for 1-2 hours before continuing to step 9.

Freezing instructions – Baked rolls can be frozen for up to 3 months. Thaw overnight in the refrigerator and then reheat in the oven.

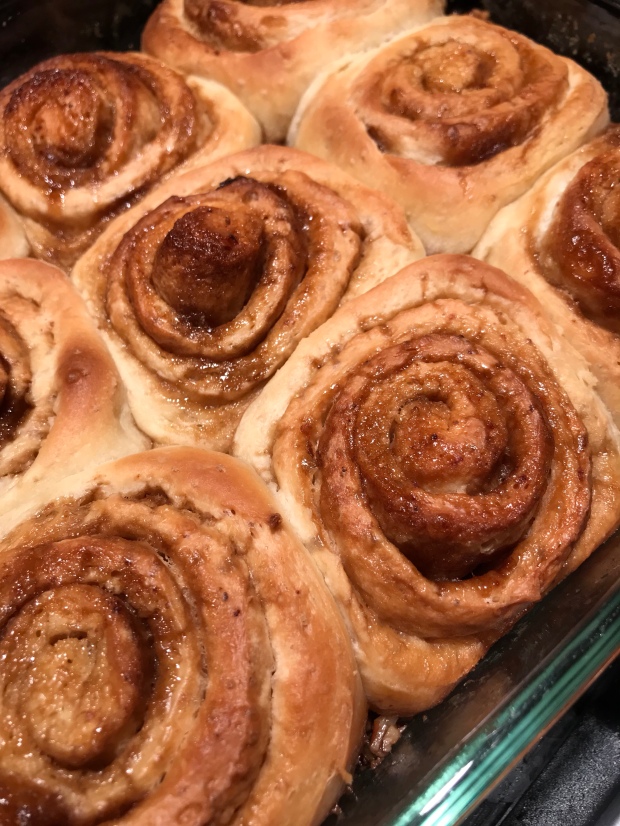
Fresh from the oven before you flip!

The “sticky” on the other side

Orange Scones

img_4736

Every winter one of my favorite items to make are orange scones. While this might not seem seasonal for some, every winter my grandmother would move her various potted plants and citrus trees into her “greenhouse”; which conveniently was just a covered patio right off the house. When we would visit during those cold months, I would love walking out there, where the smells of the citrus coupled with the heat made you feel like you were somewhere tropical instead of in the snow. Anytime I smell an orange being peeled, I’m reminded of these greenhouse visits and the memories of warmer weather to come!

This is why orange scones are a favorite of mine to make in winter, when I need a reminder that warmer weather will eventually come! My mom has perfected this recipe combining one of my favorite ingredients and memories orange peels with an easy drop scone for a very delicious breakfast treat!

SCONES
½ cup butter, room temp
1 ¾ cup flour
1 ½ teaspoon baking powder
½ teaspoon baking soda
½ cup chopped pecans
1/3 cup sugar
Grated zest of 1 orange
½ cup orange juice
1 egg, beaten
 
GLAZE
½ cup powdered sugar
1 tablespoon orange juice
 
Preheat oven to 375 degrees. Line 2 cookies sheets with parchment paper.

In a large bowl mix flour and butter with a fork or fingers until butter is pea sized. Add remaining dry ingredient with orange zest and mix well. Add orange juice and egg until just mixed. With a spoon, drop 12 equal mounts of dough onto cookie sheets. Bake 12-15 minutes until toothpick inserted in comes out clean. Allow to cool and prior to serving mix the glaze and top scone with glaze (optional top with whole pecan).